Reading time: 3 minutes.
Introduction
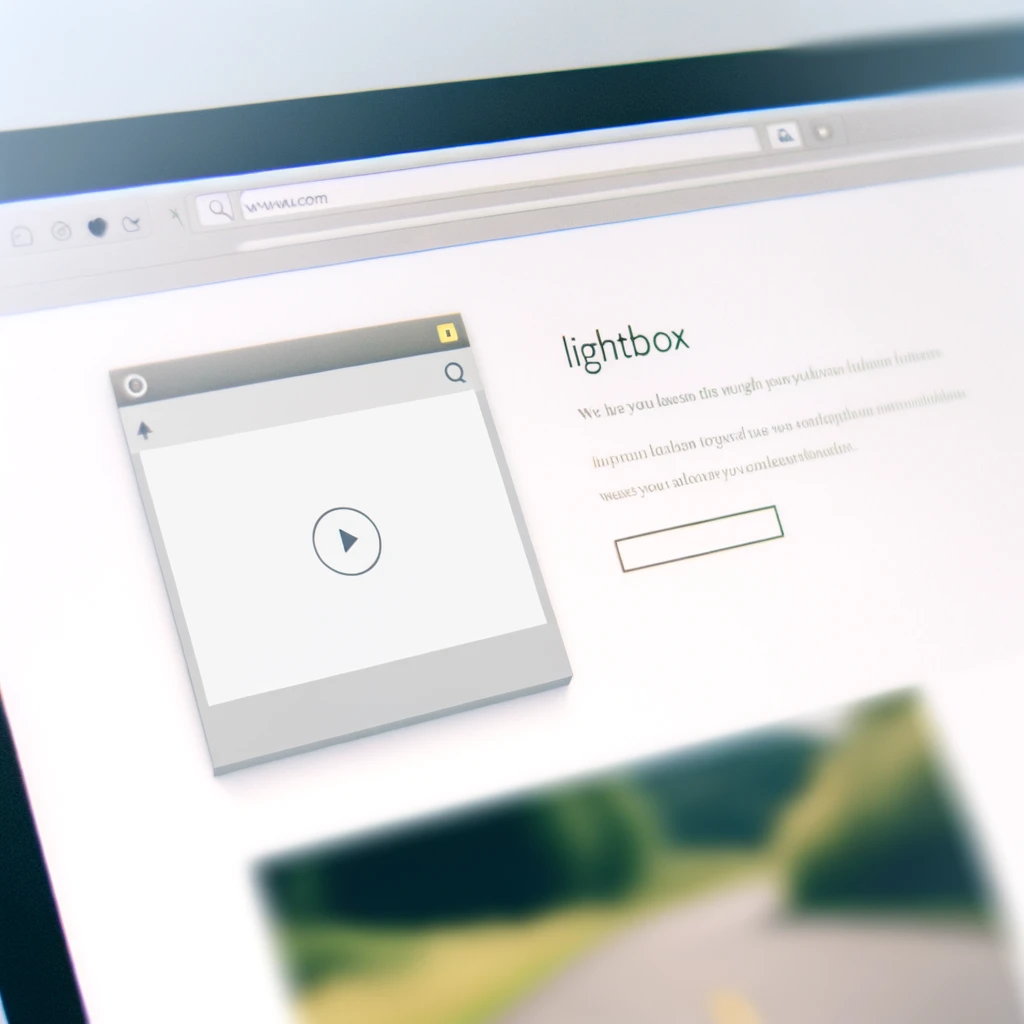
Creating a lightbox effect in web design is a popular technique for displaying images and content in a way that focuses the user’s attention. In this guide, we’ll learn how to build a simple yet effective lightbox using HTML, CSS, and a bit of JavaScript. We’ll cover the basics and then dive into some practical examples.
What is a Lightbox?
A lightbox is a script used in web design to overlay images and videos on the current page. It dims the rest of the web page and draws focus to the content being displayed. This technique is commonly used in galleries, portfolios, and e-commerce sites.
Basic Structure
Before we dive into the CSS, let’s set up our basic HTML structure:
<!DOCTYPE html>
<html>
<head>
<title>Simple Lightbox</title>
<link rel="stylesheet" type="text/css" href="lightbox.css">
</head>
<body>
<div class="lightbox">
<span class="close">×</span>
<img class="lightbox-content">
<div class="caption"></div>
</div>
<script src="lightbox.js"></script>
</body>
</html>In this structure, we have a div with the class lightbox, which will contain our image (img) and a caption (div).
CSS for the Lightbox
Now let’s add the CSS to create the lightbox effect:
/* Style for the lightbox background */
.lightbox {
    display: none; /* Hidden by default */
    position: fixed; /* Stay in place */
    z-index: 1; /* Sit on top */
    padding-top: 100px; /* Location of the box */
    left: 0;
    top: 0;
    width: 100%; /* Full width */
    height: 100%; /* Full height */
    overflow: auto; /* Enable scroll if needed */
    background-color: rgb(0,0,0); /* Fallback color */
    background-color: rgba(0,0,0,0.9); /* Black w/ opacity */
}

/* Style for the lightbox content */
.lightbox-content {
    margin: auto;
    display: block;
    width: 80%;
    max-width: 700px;
}

/* Style for the close button */
.close {
    position: absolute;
    top: 25px;
    right: 35px;
    color: #f1f1f1;
    font-size: 40px;
    font-weight: bold;
    transition: 0.3s;
}

.close:hover,
.close:focus {
    color: #bbb;
    text-decoration: none;
    cursor: pointer;
}

/* Caption text */
.caption {
    margin: auto;
    display: block;
    width: 80%;
    max-width: 700px;
    text-align: center;
    color: #ccc;
    padding: 10px 0;
    height: 150px;
}
This CSS will style the lightbox to cover the entire viewport, center the image, and provide a styled close button.
JavaScript for Interactivity
To make the lightbox interactive, we’ll need a bit of JavaScript:
// Get elements
var lightbox = document.getElementsByClassName('lightbox')[0];
var img = document.getElementsByClassName('lightbox-content')[0];
var caption = document.getElementsByClassName('caption')[0];
var close = document.getElementsByClassName('close')[0];

// Open the lightbox
function openLightbox() {
    lightbox.style.display = "block";
}

// Close the lightbox
function closeLightbox() {
    lightbox.style.display = "none";
}

// Event listener for the close button
close.onclick = function() {
    closeLightbox();
}

// Close if outside click
window.onclick = function(event) {
    if (event.target == lightbox) {
        closeLightbox();
    }
}
This script listens for clicks on the close button and outside the lightbox content to close the lightbox.
Example 1: Image Gallery
Let’s create a simple image gallery where clicking an image opens it in the lightbox:
HTML
<div class="gallery">
    <img src="image1.jpg" onclick="openLightbox(); currentSlide(1)" class="hover-shadow">
    <img src="image2.jpg" onclick="openLightbox(); currentSlide(2)" class="hover-shadow">
    <!-- more images -->
</div>
JavaScript
function currentSlide(n) {
    var slides = document.getElementsByClassName("mySlides");
    if (n > slides.length) {slideIndex = 1}
    if (n < 1) {slideIndex = slides.length}
    for (i = 0; i < slides.length; i++) {
        slides[i].style.display = "none";
    }
    slides[slideIndex-1].style.display = "block";
}
This setup allows users to click on any image in the gallery to view it in the lightbox.
Example 2: Video Lightbox
You can also use a lightbox for videos. Here’s a basic setup for that:
HTML
<div class="video-lightbox">
<video class="lightbox-content" controls>
<source src="movie.mp4" type="video/mp4">
Your browser does not support the video tag.
</video>
<span class="close">×</span>
</div>CSS
Adjust the .lightbox-content class in the CSS to better fit videos.
Conclusion
Building a lightbox is a straightforward process that can significantly enhance the user experience on a website. By following the steps outlined in this guide, you can create a functional and stylish lightbox for images, videos, or any other content. Experiment with different styles and functionalities to best suit your website’s needs. Remember, the key to a great lightbox is simplicity and functionality.